May 5, 2014

Omega Prime Walls

I received these walls from Jeff over at Dragon Forge Designs because they matched the bases I've been buying from him for my Tohaa.


They are a pretty straightforward, modular, sci-fi design that look very cool on the table.


The end caps and wall sections can be arranged in a few different configurations to extend the length of the wall. Each wall section is 4" long, and each end cap is 1/2".


I think the only thing missing now are corner pieces!


You can see they share design elements with the Tohaa's bases - the Omega Prime series from Dragon Forge.

They are super clean pieces, too - No clean up necessary. No flash, no air bubbles... perfect casts, like I've always come to expect from Dragon Forge.

May 2, 2014

Paradiso Jungle Table

For the Paradiso Jungle table, I made a 4'x4' surface that can be placed atop any flat surface (such as the dining room table, a card table, the breakfast nook table (which is what *I* use it for...)).

Home Depot (or maybe it was Lowe's... any DIY store) had 1/2" thick chipboard in 2'x4' sheets.  That would be perfect - easy to carry and store, two next to each other make a perfect 4'x4' board.  I didn't want them shifting during game play, so I inserted some leftover Ikea furniture dowels into one side, and corresponding holes into the other half of the board to keep things together during the game.

Measure twice, drill once...
Step one was to prime both sides of the chipboard (to help against warping) with black primer. I used household interior/exterior latex primer.


Since this was going on top of the breakfast table, which is a bar-height piece of furniture my wife is WAY more fond of than she is of game tables, I helped out by outfitting the bottom of the sections with padded feet so that they would not damage any surface they are put on.  These self-adhesive, padded feet are sold for people who want to easily move their heavy furniture around hardwood floors, and are found at any hardware store or Target/WalMart-type store.


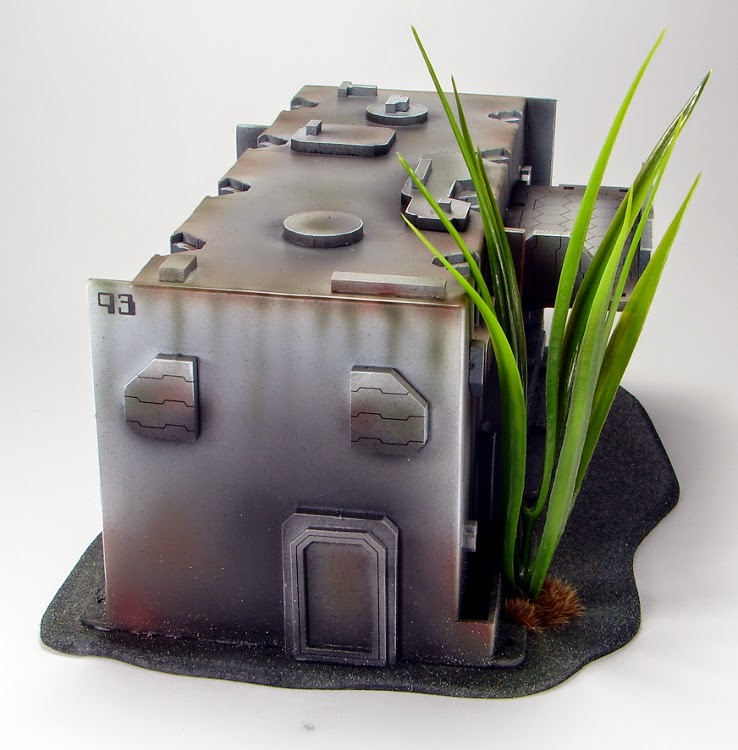
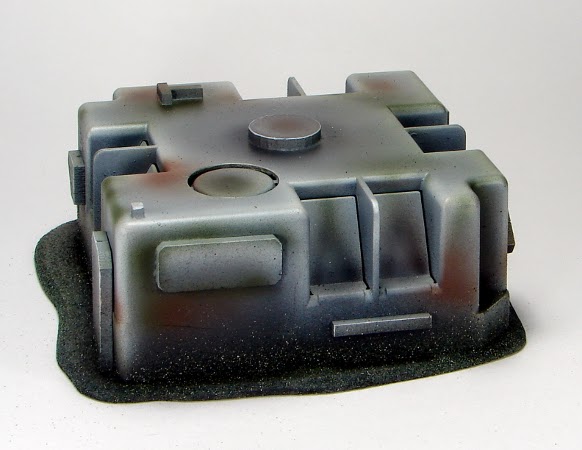
To finish the playing surface, I chose a time-efficient and aesthetically pleasing Easy Button - Rust-oleum Textured Spray Paint, Deep Forest.


I thought, once sprayed, it would look a whole lot like grass or undergrowth, so that once I plopped all the plants and buildings down on it, it would look like a proper jungle.


As I applied multiple coats, I noticed that as my spray lingered in an area, it would gradually become lighter in color, allowing a subtle variation in tone across the entire board.  I sealed the textured spray paint with several coats of matte spray varnish.

(Those of you following this blog from its inception may feel that all of this has been very familiar...)


Combined with the Jungle Buildings and Jungle Plants, the table is a great start to infinite Infinity adventures on Paradiso.


May 1, 2014

New exciting things for Infinity

Last weekend, Infinity held a seminar at a gaming event in Spain called FicZone. Bostria revealed a 3rd Edition of the game, as well as a host of images of concept art and 3D sculpts of upcoming releases.

These photos were taken from the Beasts of War exclusive video of their interview with Carlos from Corvus Belli.

Watch the original video HERE.


Cheapa$$ Jungle buildings Painted

I painted up the electrical box buildings that I had built for the Jungle/Paradiso campaign table.


I primed them black all over, and then primed the top 75% or so with grey primer.


Then I airbrushed highlights with Vallejo Model Colour Light Grey and then Silver Grey (that's not a metallic color... relax...).


I applied shading with VMC German Grey and then Black. I lined sharp edges in white.


The tiny numerals on each building are waterslide transfers from GinFritter's Gnomish Workshop, via Armorcast.


The weathering was then applied by airbrushing VMC Flat Brown and VMC Olive Grey.


Plants were hot-glued to a couple buildings' bases, and then static grass tufts added to disguise the hot glue.


Windows were quickly rendered hand-painting the area with a solid coat of P3 Coal Black. I then airbrushed the centers with P3 Regal Blue, P3 Cygnar Highlight, and P3 Cygnar Highlight mixed with some White.


I sprayed the same speckled, textured green spray that I used for the table top and the bases of the foliage along the bases of each building. I did not wrap or mask the buildings, allowing the spray to create a natural gradient up the base of each building.


If I wanted to really go to town, I would add overgrowth growing up the sides of the buildings with lichen or coarse turf flock, glued on, sealed, and painted. But I think these will be fine as-is, with a good balance of time and money spent vs aesthetics and playability.


Their biggest downside is that you cannot move INTO them, nor play inside them - You have to go around or climb over. Building kits like those that Warsenal makes are still best for maximum playability.