Here's a little tour of the space, starting to the right as you enter through the door.

There's the display cabinet, full of painted miniatures. The shelving hidden in the bottom half holds some supplies, but mostly it is primed models awaiting paint.

Next to that is a music stand that holds all my reference material. Recipe books, concept art, reference pictures - anything I need to... well, reference while I work. It sits just to my right as I sit in my painting chair - which brings us to:

The painting desk! Paint racks hold my variety of paints. You can see I re-bottle most of them - the P3 and the GW - into dropper bottles. You'll also see that the ones I use the most, the P3 Paints, are front and center, easy to hand. Two water jars - one for rinsing the brush or normal paint, the other for metallic paint only. Rinse in the same jar, you're liable to get those metallic flakes in your normal paint. And I don't know what I'd do without my Ott-Lites.
Boba Fett?!? Boba Fett?!? Where?!?
Directly to the left of that is my build desk:

I like having the separate area for building, so I don't have to worry about getting plastic shavings and metal filings in my paints. Bookshelf extenders make great table-top shelving for the tiny stuff we work with. These, and the two desks, are from Ikea. There are more bookshelf extenders on the floor, one under the paint desk, one next to the build desk, to keep even more items easily accessible and organized.
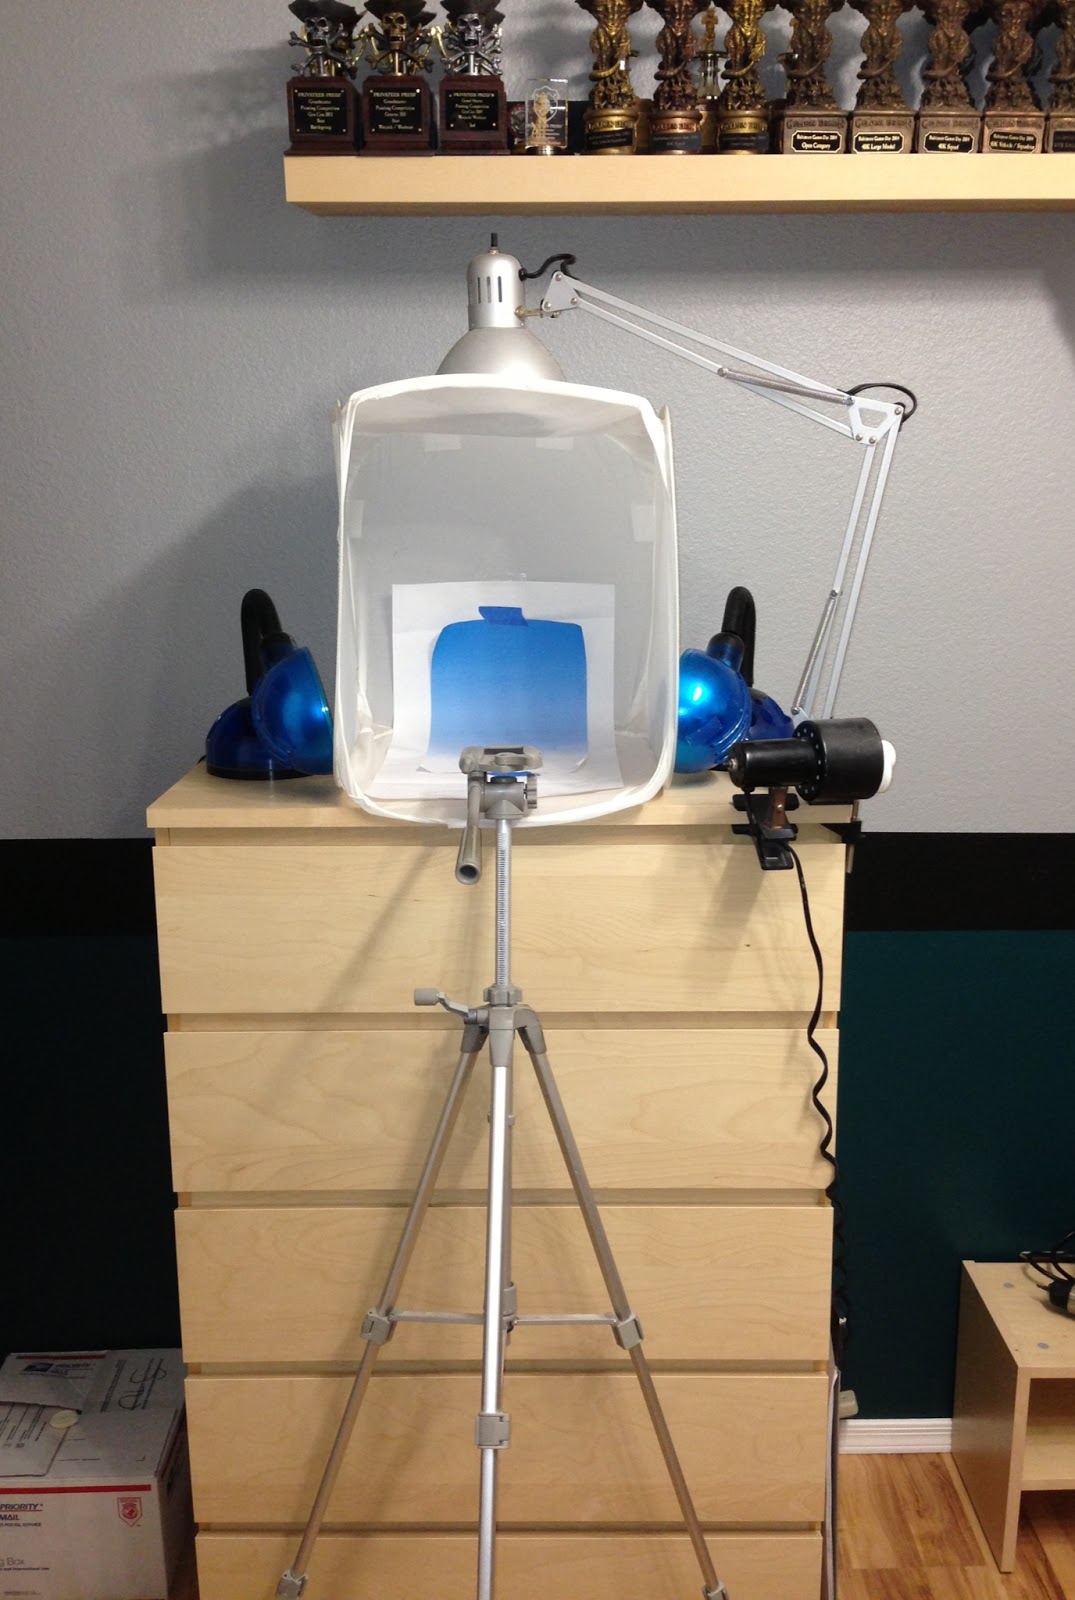
On the next wall is a dresser unit that stores a bunch of raw materials, half-built kits, spray paints, and a metric butt-ton of dice. On top of this I am able to have my photo booth perpetually set up. The tripod folds up and stores easily in the closet when not in use. Note the four light sources for photography - one above, one from either side, and then a hand-held one (the black clip-on) that I point in from the front. All inside a white light cube that bounces all that light around nicely. Daylight-type, or "Reveal" bulbs work great. Avoid yellow lights like "soft white," or the greenish tinge of awful fluorescents.
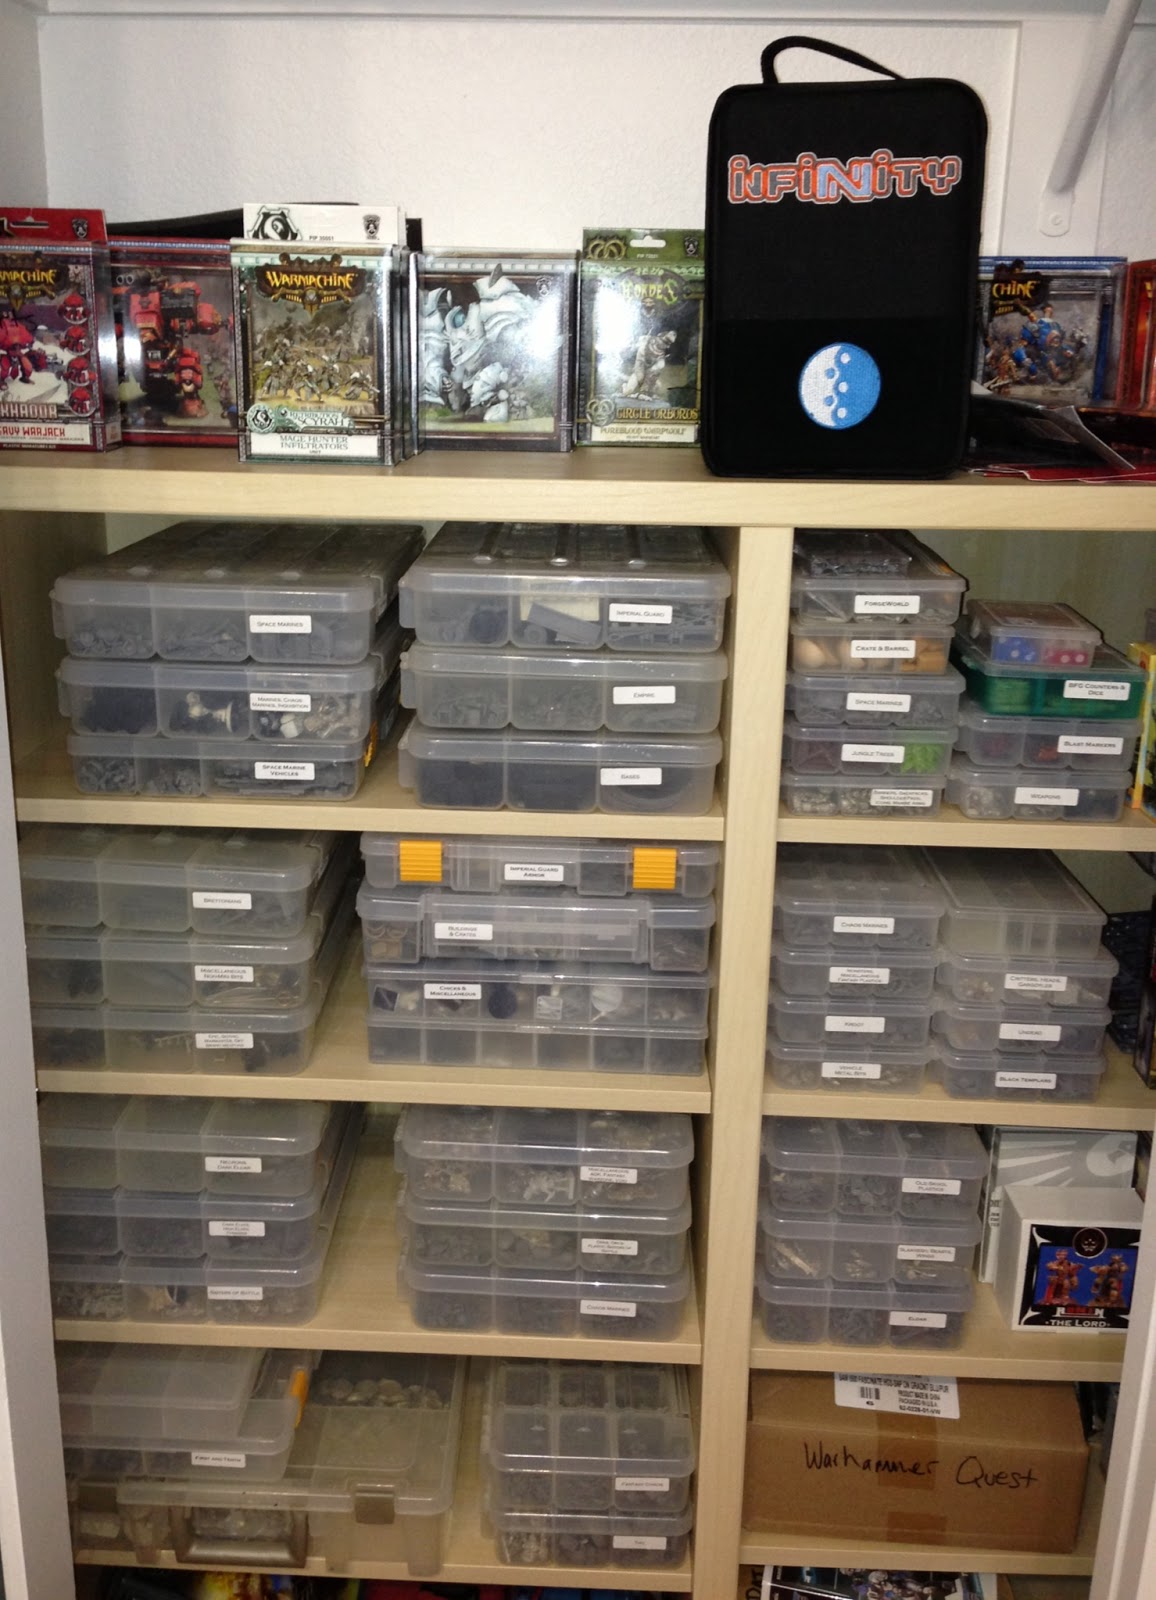

Then the final wall, the closet (when we walked in, this is to the left in line with the doorway). I've rigged the inside of the closet with a pegboard to house the racks of unpainted blisters, while the left side holds shelving that racks my storage bins of sorted and organized un-sprued "Bitz." Above these photos are shelves that store trays and trays of Battle Foam, and all the junk that didn't fit elsewhere.
Thank you for joining me on this episode of MTV's Nerd Cribs!
Nice set up Tom, and I would recommend a LED light for your painting room. I discovered this when living in Japan using the LED improves the amount of light in my painting area 100%. I don't even use my Negative Ion Natural Lamp that much as the amount of light generated by the LED overwhelms it ;). I like your mini shop of toys on racks lol...:)
ReplyDeleteTom,
ReplyDeleteGreat set up, but how do you rebottle you P3 paints into dropper bottles without wasting a lot of paint on the sides of the bottle and not adding a lot of water to it. Is there a secret to it.
Did I just ask a stupid question.
Dennis
Dennis - there are no stupid questions. Just stupid people.
ReplyDeleteFirst, use some kind of rod (I have plastic cocktail skewers) to pour the majority of paint from the pot to the bottle. The paint will travel down the rod into the pot.
Second, use one of your bigger brushes to get inside the pot and scrape down the bottom and walls of the pot, again pouring it along the rod into the pot.
You'll never get it ALL, but you certainly get MOST of it. There's not a ton of waste at all.
Man that's some nice digs. But more importantly, well-organized. I find my mess gets on top of me every week or so, and then I finally dig myself out every couple of months! Please tell me you tidied up for these photos :)
ReplyDeleteActually, I just said to my co-worker today: "Man, I probably should have cleaned up a bit first!"
ReplyDeleteReally nice set-up Tom! As Dave said, it's really nicely organised. If you were planning on cleaning prior to this photo shoot, perhaps you need to test for OCD! :P hehe
ReplyDeleteLoving the Tomlog, or is it a Schlog? I like the latter better. :)
Ironclad (Mick)
Great setup - makes me want to go organize!
ReplyDeleteSchlog. Heheheheeee.
Tom, do you use your air brush at your desk? Pics you've shown seem to say yes.
ReplyDeleteI imagine even without a hood, if you spay lightly indoors it doesn't get all over everything, right??
I do not recommend spaying anything indoors, by yourself. Take your pets to the vet for that!
ReplyDeleteBut, yes - I spray indoors, right at my studio desk. You can sorta see in the photo that I put down white contact paper over the surface of the desk, and change it out periodically. Any overspray hits that.
Nice, I've got some of the same Ikea furniture. Where did you get the plastic storage bins for all the small parts you have on the shelves, they look like they have quality latches like my Stanley ones, but still have the clear sides unlike mine.
ReplyDelete